
Gain an expert-level understanding of Steno Connect’s features and settings
Our signature videoconferencing platform, Steno Connect, is built specifically for remote depositions and remote bench trials. It combines state-of-the-art videoconferencing with seamless exhibit handling, along with numerous features designed to meet specific legal needs.
Our web-based platform also requires no downloads and provides you with a personalized, simple login.
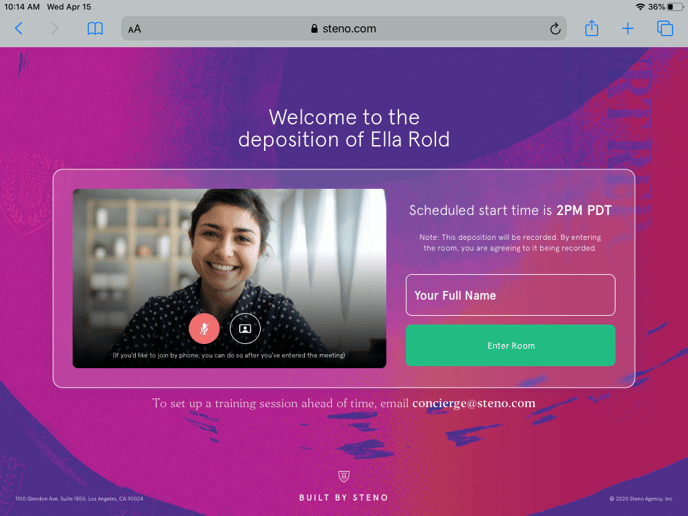
After watching the video demonstration or reading this article, you’ll gain an understanding of what Steno Connect can do for you.
Table of Contents
- Customizable Video Layouts
- Seamless Exhibit Handling
- Exhibit Annotation Feature
- Icons and User Controls
- On and Off the Record Feature
- Concierge Customer Service
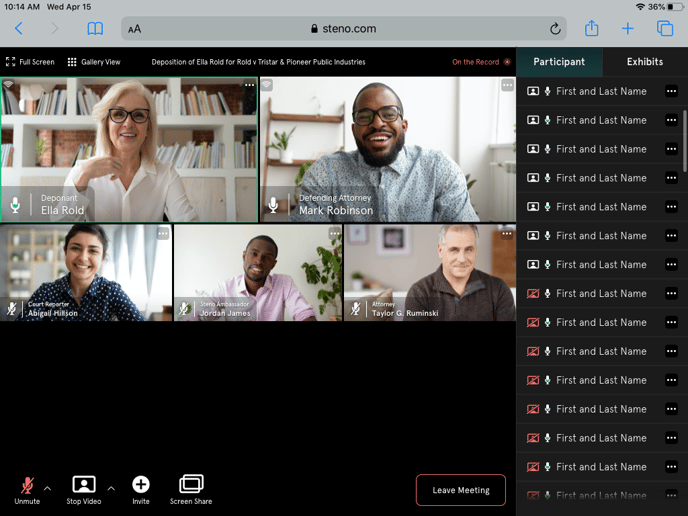
1. Customizable Video Layouts
Our video feed customization allows everyone to create their own arrangement.
There are five video slots on your home page. They take care of all your main participants in the deposition process. This feature also helps preserve bandwidth, ensuring no one has a glitchy video or distorted audio.
Each individual can select the five video feeds they would like to view during the virtual proceeding. You can also update your view at any time new witnesses take the stand or during sidebar conversations.
To customize your view:
- Open the participant tab
- Click the three dots to the right of the participant’s name that you would like to view
- Assign the participant to a slot by clicking slot one, slot two, and so on
Once you’ve assigned a participant to each slot, then you can select which view mode you prefer, standard or single view.
The standard view displays five video feeds, with the top two slightly larger than the bottom three. In this mode, we recommend customizing your view to assign the following slots to the following participants:
- Deponent
- Taking Attorney
- Court Reporter
- Defense Counsel
- Defense Counsel
In the single view, slot one becomes the biggest slot. Two through five appear smaller. In this mode, we recommend placing the deponent in slot one.
2. Seamless Exhibit Handling
With Steno Connect, exhibit sharing and annotations are seamless. Simply click on the exhibits tab, and a repository box will appear. You can either drag and drop files or click browse to identify exhibits in your file explorer.
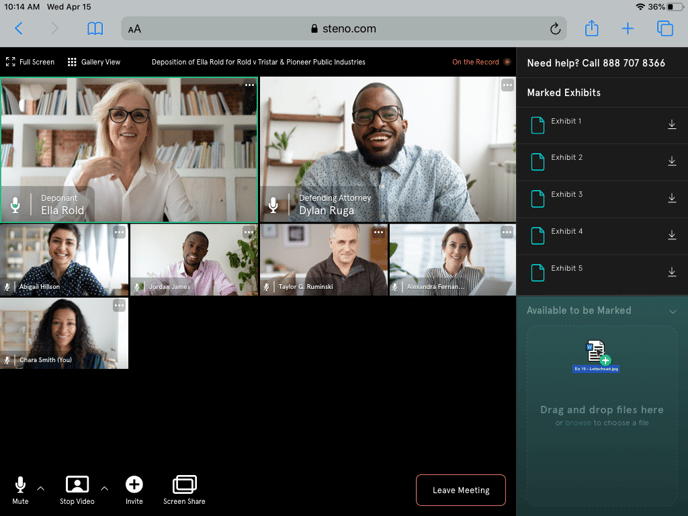
You can upload many document types, including JPEG, PNG, PDF, and MP4 files.
When you upload an exhibit, it first appears as a preview. The preview is only visible to you.
The exhibit’s tab serves as a digital banker’s box. You’re able to log into the deposition early to preload and prepare your exhibits to be marked in advance.
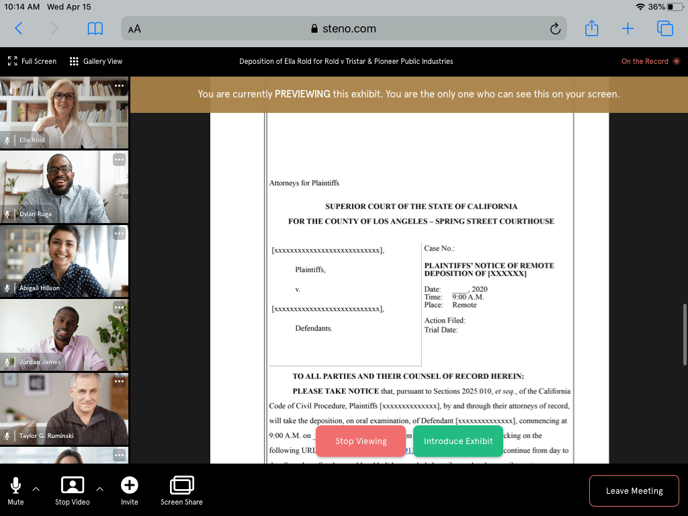
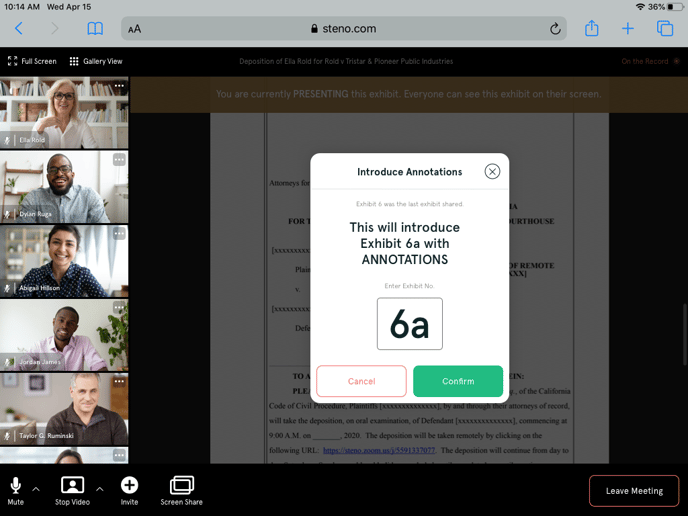
Once an exhibit is uploaded, you can click on it to see a full-size preview. This serves as a double-check mechanism. After confirming you have the correct exhibit, simply click the introduce exhibit button, and you’ll be prompted to type a label.
When you click confirm the exhibit is marked and available for viewing to anyone in the deposition room.
You do not need to include the word “exhibit” in the file name that you type.
.png?width=688&name=04.3%20-%20%20Exhibit%20View%20-%20Introduce%20-%20Popup%20(1).png)
There are several exhibit handling options available once you have finished marking them. You can view, present or download marked exhibits.
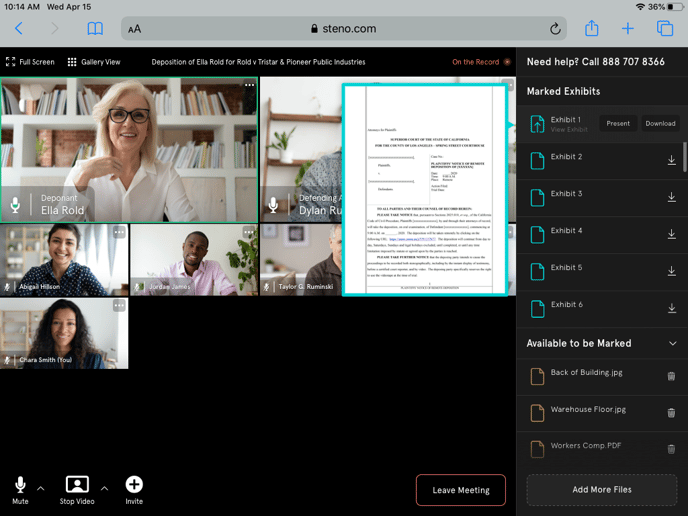
When you view an exhibit, no one else can see that you’re viewing the document, and you are free to look at it in full size on your screen.
When you select present, the exhibit will be displayed in the middle of everyone’s screen simultaneously. The person presenting is responsible for scrolling or moving the exhibit for all participants.

Any participant can download a copy of the exhibit at any time after it is marked.
Steno Connect also includes a zooming feature that allows participants to zoom in and out on exhibits in presentation mode. Participants can also make annotations on a zoomed-in exhibit to provide more detailed annotations. By clicking the + and - buttons, users can increase the size of an exhibit by up to 300%.
3. Exhibit Annotation Feature
While an exhibit is being presented, the presenter has the option to enable annotations.
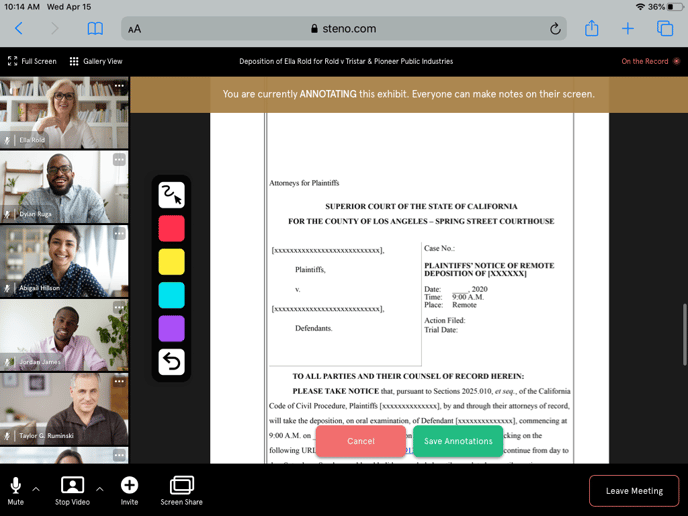
Any participant can click on a color and make annotations within an exhibit. Annotations can bring attention to important information or capture details that enhance the deponent’s testimony.
In addition to color-coded drawing tools, Steno Connect also includes a rectangle tool. Participants can draw a transparent rectangle to highlight a specific area or entire section of the exhibit.

After an exhibit is annotated, you can save the annotated copy of the original exhibit directly back into the exhibits tab. Clicking save annotations allows you to relabel the document.
Once you stop presenting, you’ll see the annotated copy in the exhibit tab repository.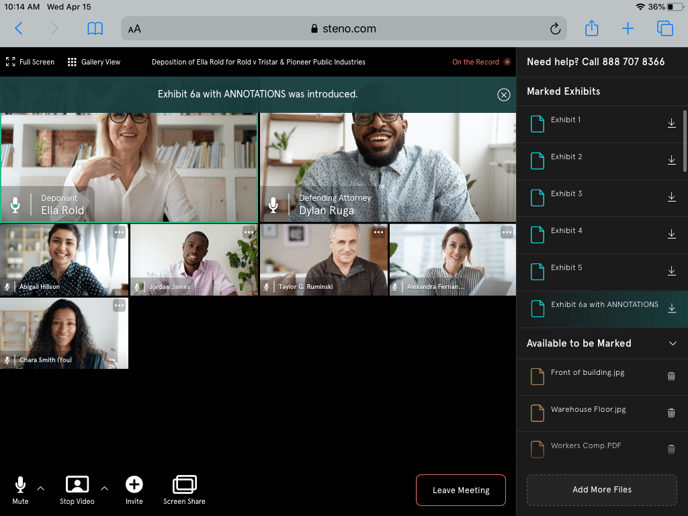
4. Icons and User Controls
Upon login, you have the option to join a deposition by integrated computer audio or dial-in. At any point, if you’d like to dial in with a phone, you can click the dial-in icon for information on switching your audio connection.
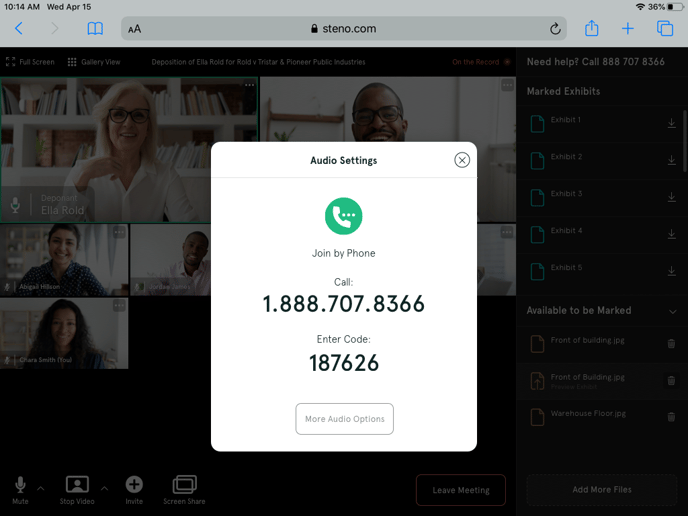
Once you enter your personalized code, your audio will automatically switch without any further action required on your part. This prevents echo and feedback from interrupting the call.
Additionally, you can share your screen by clicking the share screen icon at the bottom left of your screen. This is helpful if you’d like to share something but not upload it as an exhibit.
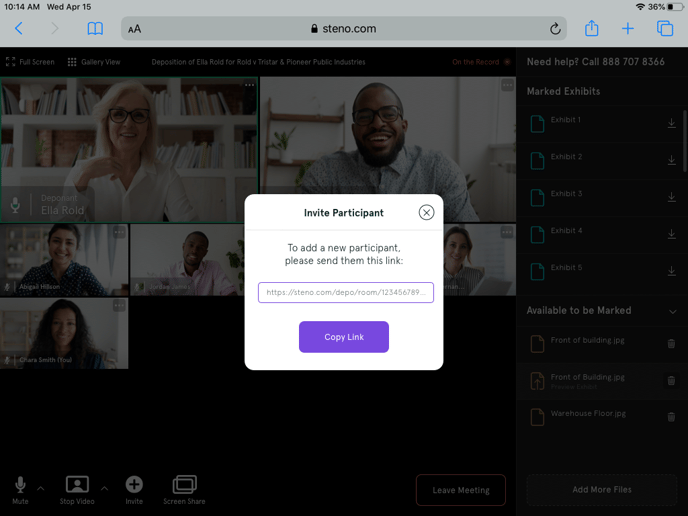
The invite icon populates a link you can copy, paste, and send out to any participant.
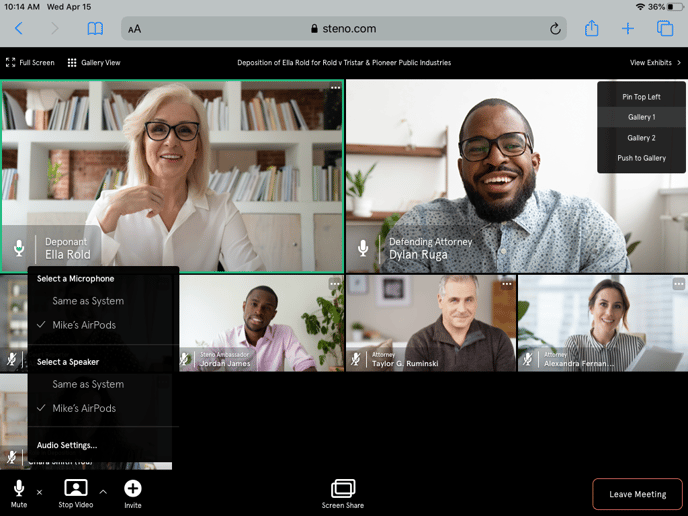
The mute and stop video icons enable you to turn off your video and mute yourself for privacy during breaks. The arrows to the right of both icons allow you to toggle between devices like external microphones and webcams.
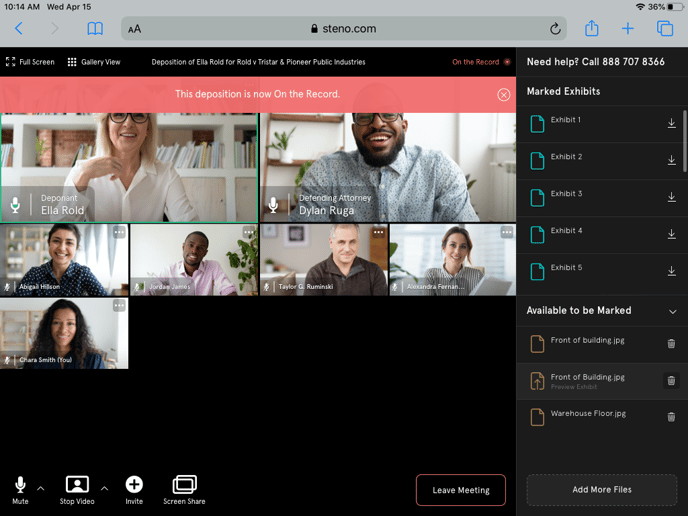
5. On and Off the Record
Steno Connect contains on and off-the-record features. Only Steno videographers, court reporters, and technology assistants can control this feature.
When the proceeding goes on the record, a red banner will appear across the top of every participant's screen, so they are aware that everything will be captured for the court record.
When you go off the record, a green banner will appear across the top of every participant's screen.
-1.png?width=688&name=02.4%20-%20Off%20the%20Record%20Banner%20(1)-1.png)
This helps everyone in the room to be on the same page. Additionally, if someone joins the deposition late, they will see the notification and immediately know the status of the proceeding.
6. Concierge Customer Service
We strive to provide excellent customer service and technical support throughout the entire remote litigation process.
Steno provides a technology assistant or videographer trained in technology support for every deposition. They will join the meeting in advance and are available to answer any questions and troubleshoot technical issues. They also remain on the call throughout the proceeding.