![Steno_Shield_Logo_White_Transparent-1.png]](https://help.steno.com/hs-fs/hubfs/Steno_Shield_Logo_White_Transparent-1.png?height=40&name=Steno_Shield_Logo_White_Transparent-1.png)
Before you start
-
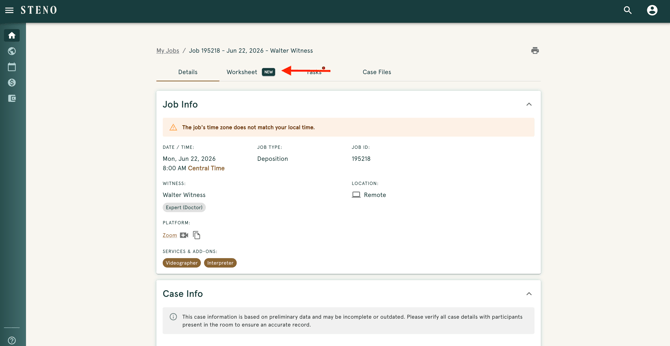
The Worksheet is how you report the details of a job once it's complete. Find it on your provider dashboard by opening the job under My Jobs, then click the Worksheet tab.
-
The worksheet becomes available on the day of your job. Before that, you'll see a "check back later" message. It's due within one business day of your job, even before your files are ready.
-
You can click Save at any point and finish later.
NOTE: If the job was cancelled after you arrived, you do not have to fill out the worksheet. Instead select Mark as Late Cancel instead. That notifies the team and skips the rest of the form.
Step 1. Access your Dashboard
- Log into your Dashboard
- Select Worksheet
Step 2: Review Job Information
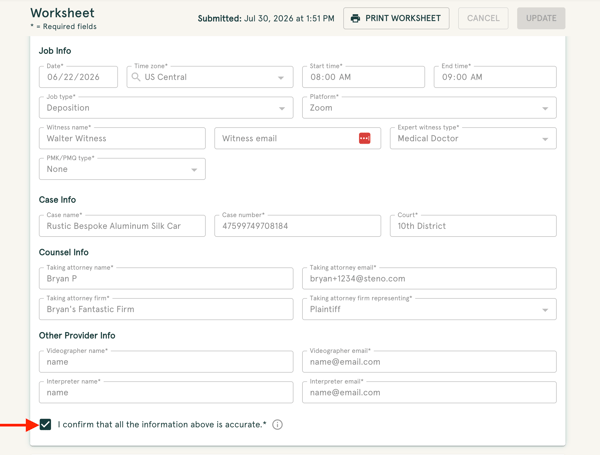
This section loads first and comes mostly filled in already. Confirm that all of the details are correct.
If something is incorrect, use the edit button to fix it. Once it all checks out, check the box confirming the information is accurate. That locks the section so nothing changes by accident.
Tip: The taking attorney and witness live here. You do not add them under Attendees.
Step 3: Additional Job Information
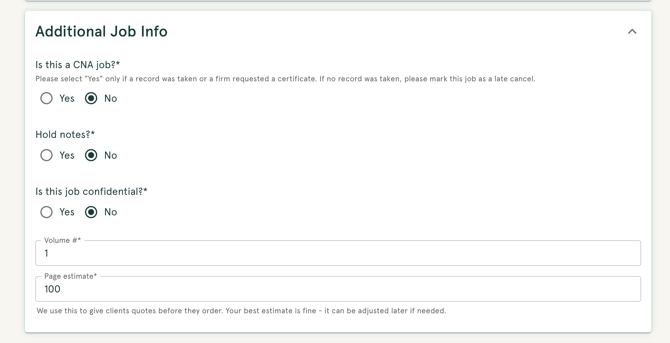
Set any job flags that apply, like CNA, hold notes, or confidential, and enter your page and volume estimates. If you mark the job confidential, a notes field appears.
Step 4: Attendees
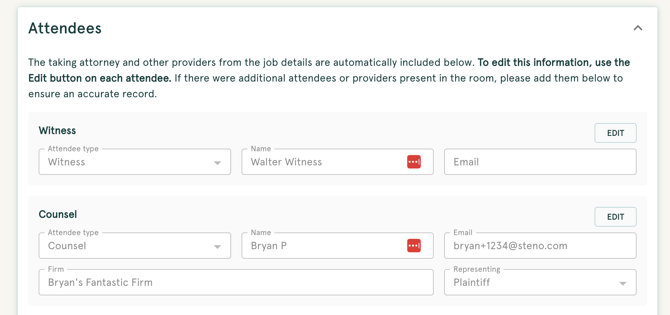
The taking attorney, witness, and any videographer or interpreter are already added for you. Use this section to add anyone else who was present.
-
Confirm those names are correct, then use the Add Attendee button for anyone else who was in attendance.
-
If you're working a trial or back-to-back jobs on the same case and already submitted a worksheet for it, click Import from prior worksheets and check off the people you want added. You'll still review them before submitting. If no one else was there, check "No additional attendees."
Step 5: Read and Sign
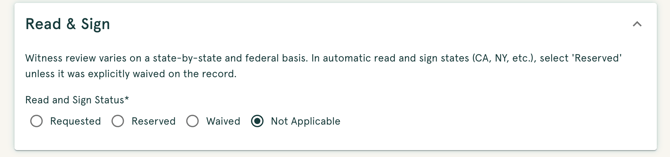
Choose the Read and Sign status for the witness. In states where it is automatic, such as California and New York, choose Reserved unless it was waived on the record. If you choose Requested or Reserved, a few more fields appear for the requestor.
Tip: This section is hidden for some job types, such as trials and hearings.
Step 6: Exhibits
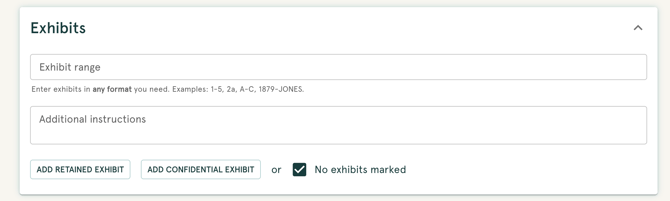
If there were exhibits, enter the exhibit range and add each one that was marked. If there weren't any, check "No exhibits marked."
Tip: You need one or the other checked. The form won't submit without it.
Step 7: Orders
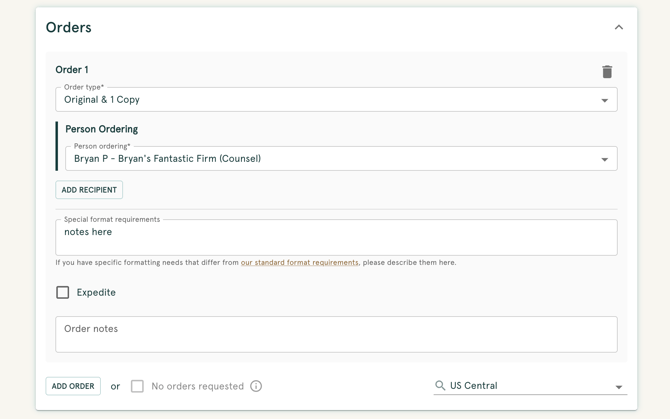
Add each transcript order and who it's for. If an order is a rush, check Expedite and fill in the Date ordered and Deliver by date. If there's no deadline, check "No deadline given" and those date fields drop off. If no orders were placed, check "No orders."
Step 8: Save or Submit
Save keeps a draft so you can pick it back up later. Submit checks your entries and asks you to confirm. If anything's missing, the form points you to it. Fix it and submit again.
After you submit
Click Print for a PDF copy for your records. Need to change something after submitting? Email concierge@steno.com and we'll help.
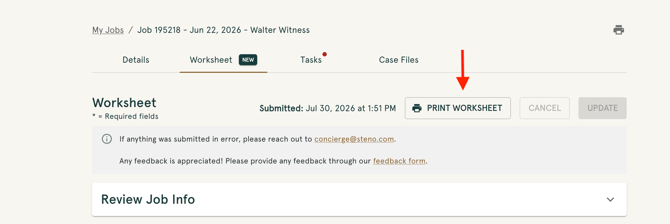
Note: Worksheets can't be edited directly once submitted. If you need a change, that email is the only way.
Frequently Asked Questions
Where do I find and start my worksheet?
Log in to your provider dashboard, open the job under "My Jobs," and click the Worksheet tab. You can start the worksheet on the day of your job; prior to that, a "check back later" message will appear.
When is the worksheet due, and can I save a draft?
Submit your worksheet within one business day of your job, even before your files are ready. You can click Save at any time to keep a draft and complete it later before the deadline.
Why won't the exhibits section let me submit?
The form requires you to either add the exhibits and enter the exhibit range if exhibits were present, or check the No exhibits marked box if there were none.
What if the job was cancelled after I arrived?
Open the Worksheet tab and select Mark as Late Cancel. This notifies the team and skips the rest of the worksheet.
Can I edit a worksheet after submitting it, or fix a mistake?
Worksheets cannot be edited directly once submitted. If you submitted an error or need to make updates, email concierge@steno.com for assistance.
Do I still need to submit a separate invoice?
Yes. The worksheet process is currently separate, so you must continue submitting your invoice as you normally do.